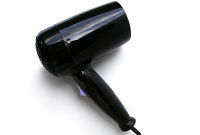
For successful styling it's essential that you start with the right hair products and tools, and one of the most popular styling tools is a blow-dryer.
The blow-dryer is capable of creating straight, volume-filled or curly hairstyles, so it’s a must-have item. These handy tips will explain what to look out for when buying a blow-dryer, styling aids to consider and how to maintain your blow-dryer.

Blow-Dryer Buying Tips
Good Quality
It’s extremely important to purchase a blow-dryer that it has plenty of power and is good quality. At least 1800 watts of power is what you’ll need to ensure you always get a good result and shave time off styling. Good quality doesn’t always mean sky-high prices though, so shop around and you should be able to find a blow-dryer that suits your needs and your budget.
Attachments
Make sure your blow-dryer comes with a nozzle attachment and a diffuser.
The nozzle attachment will allow you to concentrate the air of the blow-dryer along smaller sections of your hair and is especially helpful for creating straight hairstyles.
The diffuser attachment disperses the air flow over a larger area and should only be used on a cooler temperature. It’s designed to help you dry your curls without making your curl lose its shape.
Blow-Dryer Styling Aids
A heat retaining hair brush that stores the heat from your blow-dryer to make styling faster and give your hair a smoother finish (as opposed to a regular hair brush) should be top of your list, as well as a blow-dryer that’s fitted with a cool shot button. The cool shot button is a great feature to have because it cools down the heated air that your blow-dryer puts out to allow you to set your hairstyle in place so your hard work isn’t wasted.
Blow-Dryer Maintenance
It’s a good idea to regularly clean your blow-dryer, the attachments and the filter so that it maintains its effectiveness. The easiest way to do this is to carefully take apart your blow-dryer and clear away any dust or hair that’s accumulated and then give everything a wipe with a warm, slightly damp cloth. Then all you need to do is allow all of parts to thoroughly dry before putting your dryer back together.


